
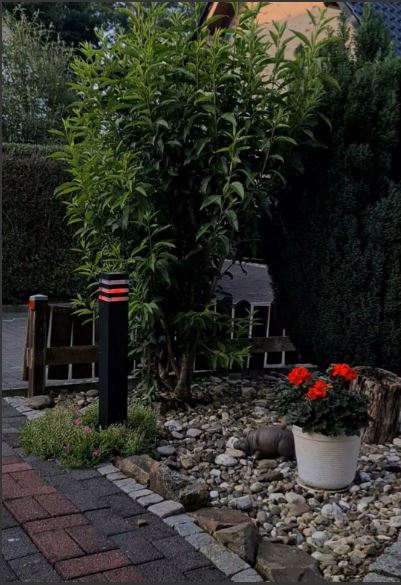
Outdoor motion detector & lighting for HA
This project outlines how to create a smart outdoor lighting system for your front door and even Christmas lights.
The system is integrated into Home Assistant, enabling comprehensive control and automation,
The ESP32 is programmed with ESPHome to connect directly to Home Assistant.
Project Goals and Capabilities:
The aim is to build a smart lighting with the following features:
Dynamic LED effects: Display Lights with various animated patterns.
Motion detection: Utilize a RCWL-0516 radar motion sensor for accurate movement detection.
Wireless automation: Remotely turn lights on and off, Monitor light status and receive alerts for malfunctions.
Home Assistant integration: Connect the system to Home Assistant for centralized control and automation.
Adjustable timing: Control the delay time for lights to remain on after motion and control the light based on sunrise and sunset.
Brightness and dimming control: Fine-tune light intensity and dimming transitions.
Integrated audio: Play Christmas carols via a speaker, by using a ESP32’s with I2S support. (optional)
Components Used:
Here’s a list of the components essential (currently) for this smart lighting project:
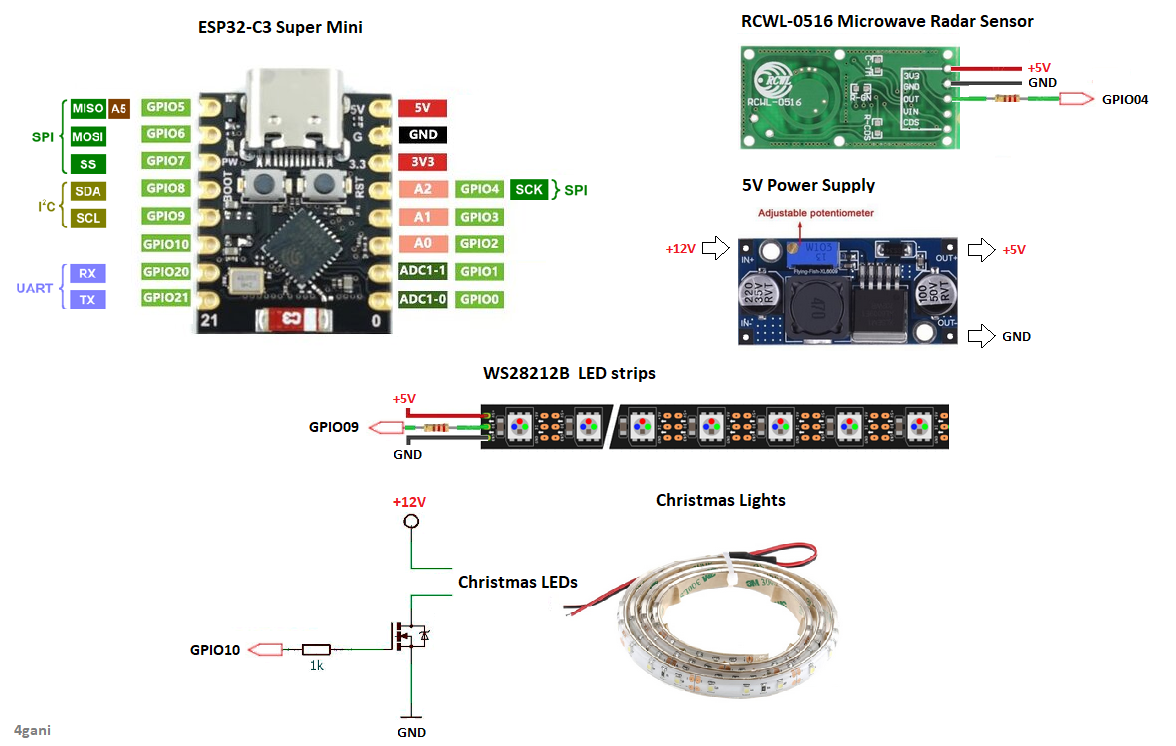
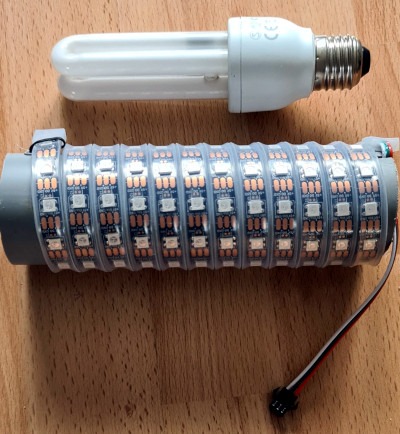
LED Strip: A 2-meter strip of 5V WS2812B SMD5050 IP67 with 120 LEDs in total.
Microcontroller: An ESP32 C3 SuperMini
Motion Detector: A RCWL-0516 microwave motion detector
Home Assistant & ESPHome: The central software for integration and automation.
Light Dependent Resistor (LDR): Optional
3.3V Power: require for ESP32 and motion sensors.
5V Power: LED Strip require a +5V power supply.
For the 5V power supply, I used a small step-down board and convert the 12V solar panel to 5V.
Resistors:
10k Ohm Resistor, 220-330 Ohm necessary for current limiting.
Additionally, we can use Home Assistant automation to automatically control the lighting sequences.
For example:
– Use of the sun’s position to switch the lights on and off at any time of day or night
– Setting the delay time in combination with lighting effects
– Controlled Brightness and Color Temperature for Christmas lights
LED Specifications:
Note that at 60mA per LED, the total consumption is approximately 7.2A.
LED IV Brightness (WS2812B): Red: 400-700mcd, Green: 1000-1500mcd, Blue: 200-400mcd
RCWL0516 Module Specifications:
- Input Voltage – 4V to 28V
- Operating current – 3mA (max.)
- Operating frequency – 3.2GHz
- Transmission power – 20mW to 30mW
- The output maximum voltage 3.4V and minimum 0.7V, max. 100mA
- Sensing distance – 5 to 7 meters
- After triggering it keep the output time delay for 0.2 second
- VIN: is the power supply for the sensor. You can connect an input voltage anywhere between 4 to 28V to this pin, although 5V is commonly used.
- GND: is the ground pin.
- 3.3V: This is the regulated output pin of 3.3V/100mA
- OUT: This is the 3.3V TTL logic output. It goes HIGH for two seconds when motion is detected and goes LOW when idle (no motion detected).
- CDS: CDS is a cadmium sulfide pin where we can connect the LDR to allow the RCWL-0516 to operate only in the dark.
The code is checked into GitHub at: Outdoor-Lighting
It is still under construction for Christmas light we have time